The Freight Container Receiving Management app introduces a streamlined process for managing the receipt of overseas freight containers. Designed to improve visibility, accuracy, and efficiency in receiving goods, this app helps purchasing and warehouse teams easily handle complex inbound logistics.
Here’s what makes it different:
Build Containers from Multiple Purchase Orders. - Easily consolidate lines from multiple purchase orders into a single container.
Invoice Item Charges at the Container Level. - Create and manage item charge invoices—such as freight, duty, or customs—directly from the container.
Receive Items by Bill of Lading. - Process receipts based on the Bill of Lading instead of by individual purchase orders.
Track Container Contents for Warehouse Receiving. - Maintain visibility of all items loaded into a container and their receipt status.
Choose the icon to enter “User” and select the related link to open the Users list.
On the Users list, select users that will require permission to the Freight Container Receiving app.
On each of the selected User Cards, go to the User Permission Sets tab, add the necessary permission sets based on the role of the user.
Assisted Setup
Step 1 — Open the Assisted Setup Page
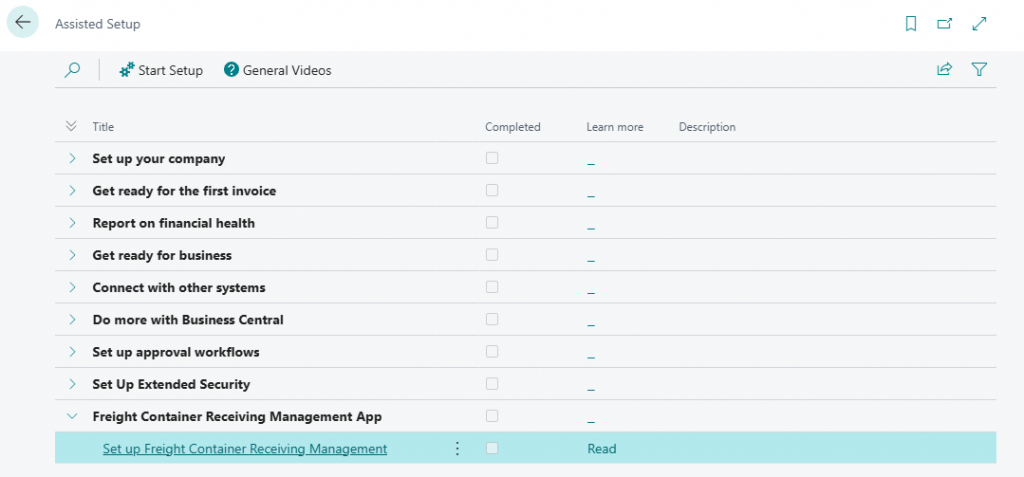
In Business Central, use the search bar (Alt+Q) and type Assisted Setup, then select it from the results.
On the Assisted Setup page, locate the entry Set up Freight Container Receiving Management under the Freight Container group.
Click the entry to launch the setup wizard.
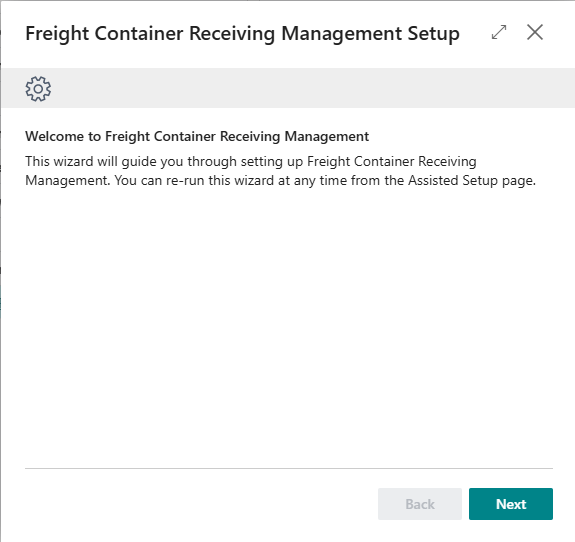
Step 2 — Welcome
Read the introduction: "This wizard will guide you through setting up Freight Container Receiving Management. You can re-run this wizard at any time from the Assisted Setup page."
Click Next to continue.
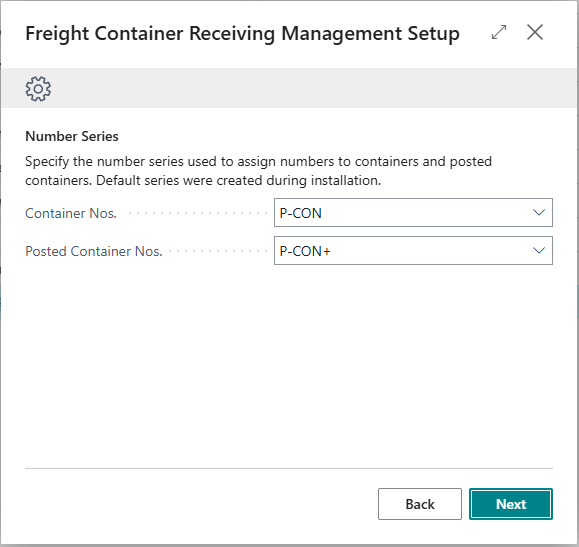
Step 3 — Number Series
In the Container Nos. field, select or confirm the number series used to assign numbers to new containers. This field is required.
In the Posted Container Nos. field, select or confirm the number series used to assign numbers to posted containers. This field is required.
Note: The Next button remains disabled until both fields are filled. Default number series are created automatically during installation.
Click Next to continue.
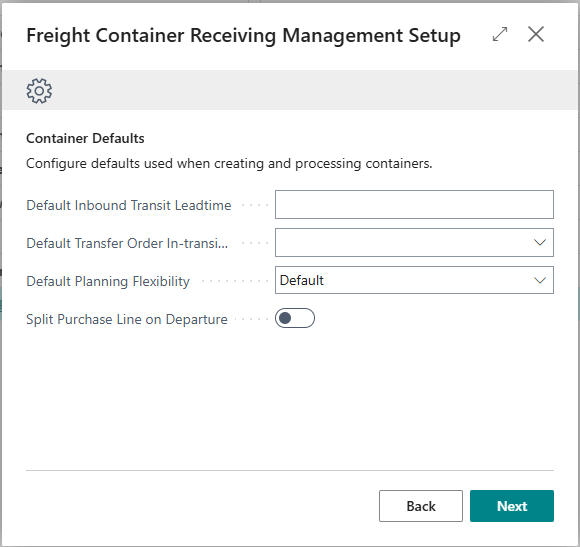
Step 4 — Container Defaults
In Default Inbound Transit Leadtime, enter a date formula (e.g., 10D) to calculate the Estimated Receipt Date based on the Vessel Arrival Date. Leave blank to skip.
In Default Transfer Order In-transit Location, select the location code used as the in-transit stop when transferring inventory to the final destination.
In Default Planning Flexibility, choose the default planning flexibility for container lines (e.g., Unlimited or None).
Set Split Purchase Line on Departure to enabled if purchase order lines should be split into multiple lines when container departure is processed.
Click Next to continue.
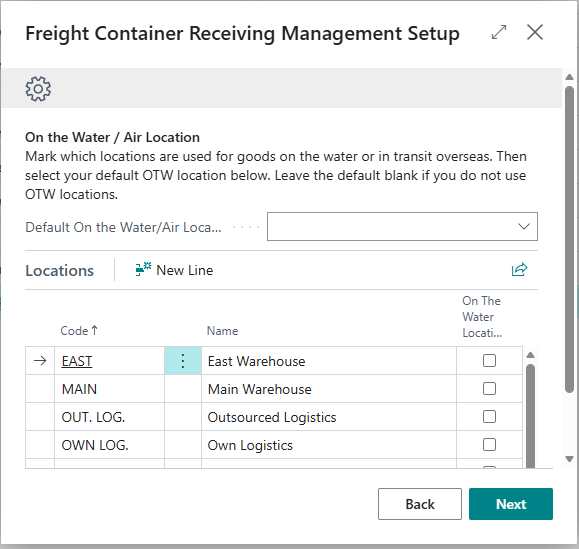
Step 5 — On the Water / Air Location
In the Locations list, create a new location with the On the Water/Air toggle enabled or enable the On the Water/Air toggle for an existing location that represents goods in overseas transit.
In the Default On the Water/Air Location field, select the location code that should be used by default. Leave blank if you do not use OTW locations.
Click Next to continue.
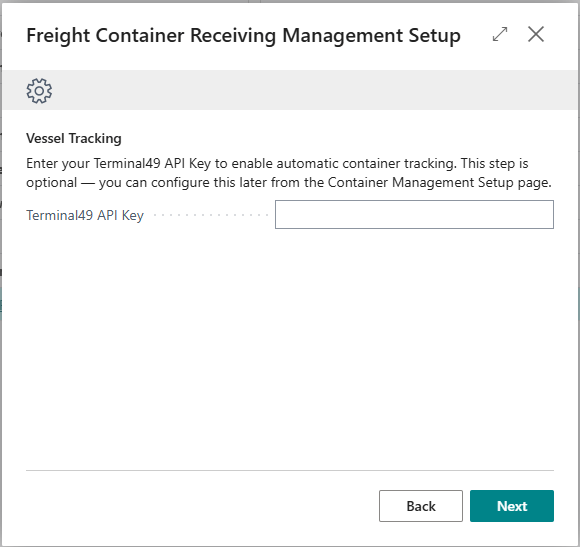
Step 6 — Vessel Tracking
The Vessel Tracking step enables automatic container status tracking via the Terminal49 integration. This step is optional.
If you have a Terminal49 account, enter your Terminal49 API Key. The field is masked for security.
Tip: You can skip this step and configure the API Key later from the Container Management Setup page.
Click Next to continue.
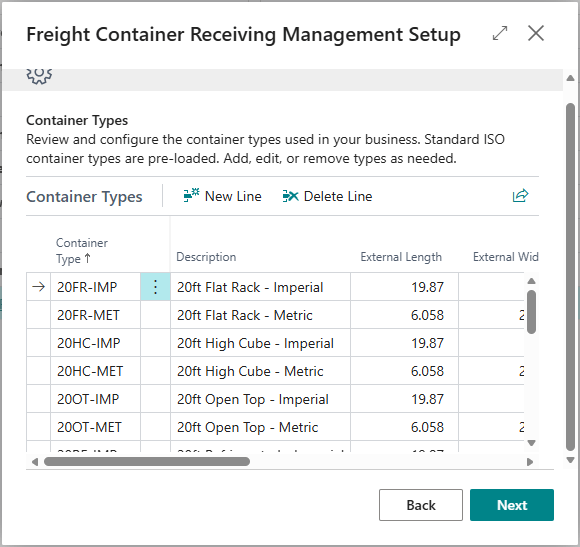
Step 7 — Container Types
Review the list. Add new types, edit existing ones, or delete types that do not apply to your business.
Click Next to continue.
Step 8 — Finish
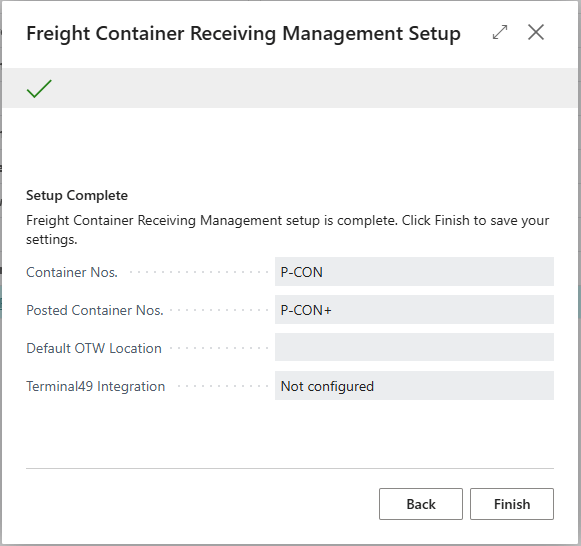
Review the summary:
Container Nos. — the number series for new containers
Posted Container Nos. — the number series for posted containers
Default OTW Location — the default on-the-water/air location (blank if not used)
Terminal49 Integration — shows Configured or Not configured
Click Finish to save all settings and mark the setup as complete.
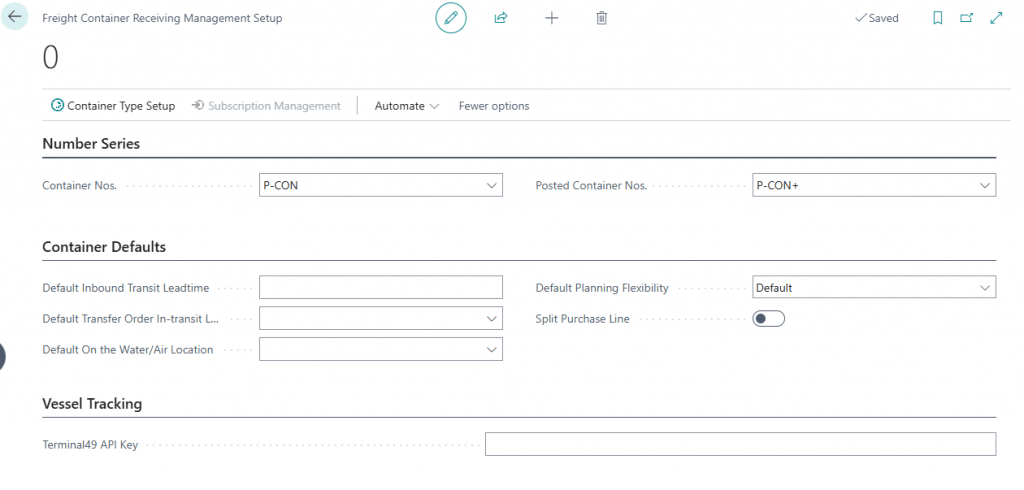
Freight Container Receiving Setup Page
Open the Freight Container Receiving Management Setup page
Define the setup that you wish to use:
*See Appendix for setting up the On the Water Location record